 | ||
|
||


|
|||||||


| Water Block Design / Construction Building your own block? Need info on designing one? Heres where to do it |
 |
| Thread Tools |

 06-24-2006, 01:45 PM
|
#51 |
|
Cooling Neophyte
Join Date: May 2006
Location: Toronto
Posts: 64
|
i really like the compression cuffs... might look into making some of my own =p. I have a CNC you might be able to use for machining this all. Only problem is I don't have one for metal at the moment, the controller went crazy and it's in for repars, should be back this week. If you could send me some cad drawings, i could machine it out and test it for you. If you can't get a cad drawing, a stereo lithography file will be ok as well, i just can't modify it without your help.
are the nozzles on the mid plate chamfered or actually rounded edges? I'm thinking about doing some completely rounded ones, it should be interesting. Physics teacher said it would have less turbulence entering the jet, and hence more flow? I'm debating methods of cutting this rounded nozzle edge. Anyone with machining experience know? |

|

|
|
06-25-2006, 01:34 AM
|
#52 |
|
Cooling Neophyte
Join Date: Jan 2005
Location: LA, CA
Posts: 53
|
You could always try to use a very fine file and a steady hand to round them.
__________________
Athlon 64 3200+ Rev F @ 2.4Ghz (and climbing) @ 1.53v, DFI Infinity UltraII-M2, 512MB Apple Micron D9 DDR2 @ 400MHz (DDR2 800) 5-5-5-12 @ 2v, 128MB Radeon X800 @ 460/900, Dual 120GB HDs in RAID 0
Loop 1: D5 Pump • Bonneville w/ AC Heater Core • Swiftech MCW6002 • Gemini Tsunami VGA block • Gemini Tsunami S478 block (cold side chiller block) 110W 16v TEC @ 60W 12v Loop 2: PC Watercooling Shop 12v Water Pump • PCWCS 80.2 Rad • Gemini Tsunami (hot side chiller block) |
|
|
|
|
06-25-2006, 02:16 AM
|
#53 |
|
Cooling Savant

Join Date: Jan 2006
Location: VA
Posts: 129
|
The "compression cuffs" are REALLY easy to make out of solid round bar if you use a decent manual lathe to taper the inside of whatever size hole you drill for the ID. Any material will do, I used 1-1/8" OD black delrin but could have just as easily made them out of aluminum, brass, nylon, or even PVC considering how thick the pieces ended up being. I need to make a few more so the next ones may be made from scrap aluminum.
I have the block design in Alibre Xpress format only at the moment. The free version can't export in other file types, but I could probably take it on a disk to the machine shop and convert it to another format that you can use if you want to make a testing copy. The nozzles have a very slight countersunk edge on both sides due to burr removal. The outlets are countersunk by hand using an X-acto knife. If a rounded bevel edge were desired I think the easiest way would be to flame-polish the plastic nozzle plate which would do all the work for you. Otherwise you would need a custom bit. I just finished the replacement nozzle plate which has the 4 holes the first one was missing. I might experiment with flame polishing on the "messed up" nozzle plate. Last edited by Captain Slug; 06-25-2006 at 03:56 PM. |
|
|
|
|
06-26-2006, 07:23 AM
|
#54 |
|
Cooling Neophyte
Join Date: May 2006
Location: Toronto
Posts: 64
|
This is very interesting indeed. I think i'll be drawing a few of those compression cuffs for cad, just because every part of my system needs the cuffs. How much space are you leaving for the rubber tubing between cuff and barb? and how thick is the tubing? I'll be making mine out of metal, and I don't want to be slicing through the tubing or anything xD.
I'll just got the metal CNC controller back from the mfg, so i'll be using that very soon. oh yeah, and for the rounded edges, a CNC could technically do that with a bore end mill. It basically is like a ball nose cutter. my biggest problem is just drawing it in proDesktop =p. I'm still very unfamiliar with the software, and i'll be taking time to learn it properly. |
|
|
|
|
06-26-2006, 04:41 PM
|
#55 |
|
Cooling Savant
Join Date: Jan 2006
Location: VA
Posts: 129
|
The tubing I'm using is 1/2" ID 3/4" OD. The cuff dimensions that I'm making are 1-1/8" OD, 3/4" ID at one end, and 25/32 (roughly 0.81") at the other. They're only meant to work with single-barbed or lipped fittings but you can make them for any size. You simply want the ID at one end to match or be a little bit smaller than the OD of your tubing. Then in the middle or one third of the way through the inside you want a gradual transition from the neutral tubing OD to the OD of the tubing that's wrapped over the thickest point on the barb.
I just made one out of brass. 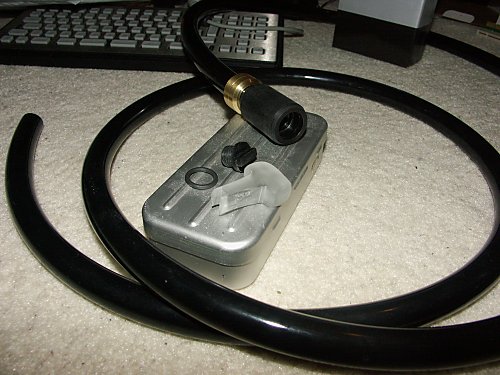 I broke my only 1/16th milling bit right as I started working on the block. Luckily nothing is messed up except the bit so i just have to wait for a replacement. If you can, I would be very very grateful if you could make just the base. It's going to be hell to make with manual equipment. I'll look into proDesktop to see if I can make the CAD file for you. Edit: Just did a leak test with the fillport and the compression cuff and YAY! They both work (as in they don't leak when subjected to 30PSI). 
Last edited by Captain Slug; 06-27-2006 at 01:07 PM. |
|
|
|
|
07-01-2006, 06:27 PM
|
#56 |
|
Cooling Savant
Join Date: Jan 2006
Location: VA
Posts: 129
|
Halfway through milling the base of the CPU waterblock. Each straight channel length requires three passes (.05" deep cut per pass).
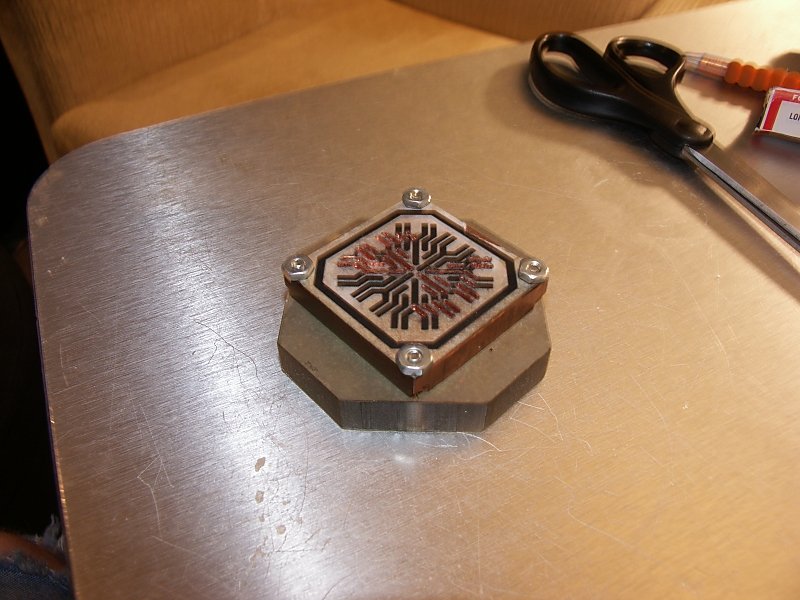 5 hours of manual work so far and 5 or 6 more to go which I'll be able to do on Tuesday. Then I just need to make the top. Slooooooow going but I've proved to myself that I can do it with the amount of patience that I have. Almost screwed things up because I hadn't thought to put a water trap on the air compressor line so it's excessive drooling of moisture which is a result of the recent rainfall amost killed my template label. I'll get a better macro shot once the base is done and cleaned. |
|
|
|
|
07-02-2006, 12:29 PM
|
#57 |
|
Cooling Neophyte
Join Date: Feb 2006
Location: Los Angeles, CA
Posts: 41
|
Looking great. Slaving over a mill for such a long time while remaining both persistant and delicately cautious is no small feat. And could that be Tygon R3400 above? A man with taste!
Methinks it's time for me to spend a few bucks on my own project. Yes indeed. |
|
|
|
|
07-02-2006, 03:46 PM
|
#58 |
|
Cooling Savant
Join Date: Jan 2006
Location: VA
Posts: 129
|
Good eye. I'm using 1/2" ID 3/4" OD Tygon R3400 for this machine. And since nobody offers anti-kink product for that size of tubing I'm using some AR15 action springs to support the tighter bends in my loop.
|
|
|
|
|
07-03-2006, 03:55 PM
|
#59 |
|
Cooling Savant

Join Date: Sep 2005
Location: Virginia
Posts: 153
|
"AR15 action springs"
Military surplus? Where abouts in Va did you get those?
__________________
I can't spell, but I am working on it. |
|
|
|
|
07-03-2006, 05:48 PM
|
#60 |
|
Put up or Shut Up

Join Date: Dec 2001
Location: Spokane WA
Posts: 6,506
|
Nice work so far. Will be interesting to see how the inlet and outlet will work out. Mostly space wise in between connectors. Make sure to leave enough room for the the thickness of both hoses and hose clamps.
|
|
|
|
|
07-04-2006, 06:30 AM
|
#61 | ||
|
Cooling Savant
Join Date: Jan 2006
Location: VA
Posts: 129
|
Quote:
Quote:
I can get back to the milling tomorrow morning. |
||
|
|
|
|
07-04-2006, 08:56 AM
|
#62 |
|
Cooling Savant
Join Date: Feb 2003
Location: Willmar MN/Fargo ND
Posts: 504
|
The milling looks great. By action springs, do you mean the buffer tube spring?
If I was to do that block, I would have milled the outside channel first, that way you dont need to plunge the little end mill. It just saves on the possibility of mistake. I havent taken my buffer tube spring out yet, but it does seem quite stiff, possibly too stiff for this kind of application. Jon |
|
|
|
|
07-04-2006, 02:39 PM
|
#63 |
|
Cooling Savant
Join Date: Jan 2006
Location: VA
Posts: 129
|
Yeah, they are kind of stiff. http://www.bravocompanyusa.com/Carbi...%20carbine.htm
 They have a good bend radius and they aren't too heavy. I shouldn't have any kinking problems in my loop though because I planned it out meticulously in advance to avoid them. |
|
|
|
|
07-08-2006, 08:49 AM
|
#64 |
|
Cooling Savant
Join Date: Feb 2003
Location: Willmar MN/Fargo ND
Posts: 504
|
What size tubing are you using?
Do you have an AR15? Jon |
|
|
|
|
07-08-2006, 10:44 AM
|
#65 |
|
Cooling Savant
Join Date: Jan 2006
Location: VA
Posts: 129
|
1/2"ID 3/4"OD
Nope, I only have .22 cal firearms. I bought the springs for an unrelated project. |
|
|
|
|
07-09-2006, 12:29 AM
|
#66 |
|
Cooling Neophyte
Join Date: May 2006
Location: Toronto
Posts: 64
|
isn't an AR15 an assault rifle? 0.o
|
|
|
|
|
07-09-2006, 12:23 PM
|
#67 | |
|
Cooling Savant
Join Date: Jan 2006
Location: VA
Posts: 129
|
Quote:
|
|
|
|
|
|
07-10-2006, 08:04 PM
|
#68 | |
|
Cooling Savant
Join Date: Feb 2003
Location: Willmar MN/Fargo ND
Posts: 504
|
Quote:
|
|
|
|
|
|
07-10-2006, 10:57 PM
|
#69 |
|
Pro/Staff

Join Date: Oct 2001
Location: Klamath Falls, OR
Posts: 1,439
|
Holy Rabbit!
|
|
|
|
|
07-11-2006, 06:31 AM
|
#70 |
|
Cooling Savant
Join Date: Feb 2003
Location: Willmar MN/Fargo ND
Posts: 504
|
just took care of that one last night lol
anyway, back to the waterblock! hows that base comming? From the pic from the 1st it looks nearly done, just missing the outer channel? Jon |
|
|
|
|
07-11-2006, 01:27 PM
|
#71 |
|
Cooling Neophyte
Join Date: Apr 2005
Location: Ludlow, MA
Posts: 15
|
Seems like that rabbit has something.. wrong.. Watching the thread closely :X interested in how it turns out, looking pretty prime thus far.
|
|
|
|
|
07-11-2006, 07:24 PM
|
#72 |
|
Cooling Neophyte
Join Date: Jan 2005
Location: WA, USA
Posts: 49
|
You missed the head! Blowing off heads is the most fun!
Keep up the good work man! If you have success with your Nazca concept I might do something similar that I had been thinking of last year. |
|
|
|
|
07-11-2006, 07:45 PM
|
#73 |
|
Cooling Savant
Join Date: Jan 2006
Location: VA
Posts: 129
|
The block is almost finished. Today I made the top and the milling on the base is 99.5% done. I just have to back to the machine shop tomorrow morning to mill the last few short legs in the channels and then mill the O-Ring groove. I left the block there because I didn't want to have to setup up the depth gauge again in the morning.
Needless to say the base has taken forever. Since I'm milling with a 1/16th" bit I can only cut out 0.05" of depth at a time. Therefore each single "leg" of each channel requires 3 passes to reach the 1/8" final depth. And since there are 88 legs total on the bases that means I've made a total of 264 cutting passes on the base. I've also gone through 5 milling bits working on this block because it took a while to figure out the best setup to avoid breaking them. |
|
|
|
|
07-12-2006, 12:04 AM
|
#74 |
|
Cooling Neophyte
Join Date: May 2006
Location: Toronto
Posts: 64
|
0.o no kidding... that would take forever definitely >.>' I wish my metal CNC was up and running. I already have a cad drawing waiting to be cut... But yeah in the mean time... i'm making my computer case =p.
|
|
|
|
|
07-13-2006, 12:28 AM
|
#75 |
|
Cooling Savant
Join Date: Jan 2006
Location: VA
Posts: 129
|
The CPU waterblock is done. I just need to take it back to the shop to put it in the ultrasound bath for a while because I've been lapping it all night long so it's all dirty again. I may need to do some touch-up milling on the top as well. All of the hard work is done and I should be able to send this out for some testing by this weekend.
The base alone has involved around 15 hours of work. 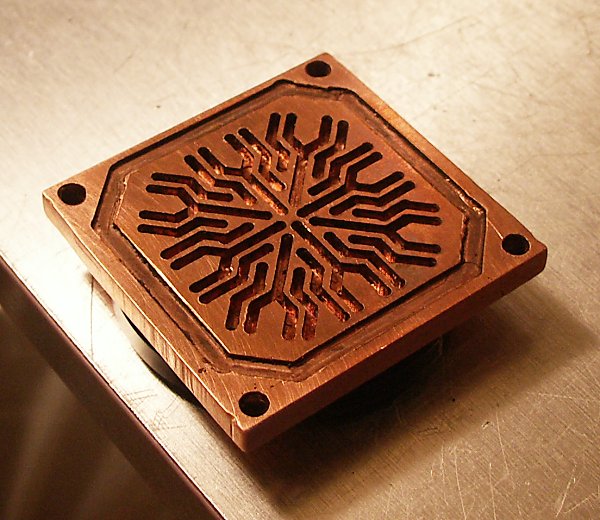 Took this picture right before I counter-sunk the bolt holes. 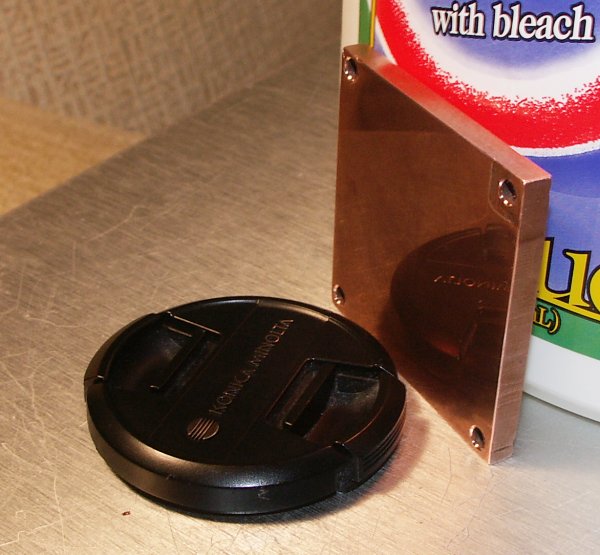 Test-fitting all the parts. 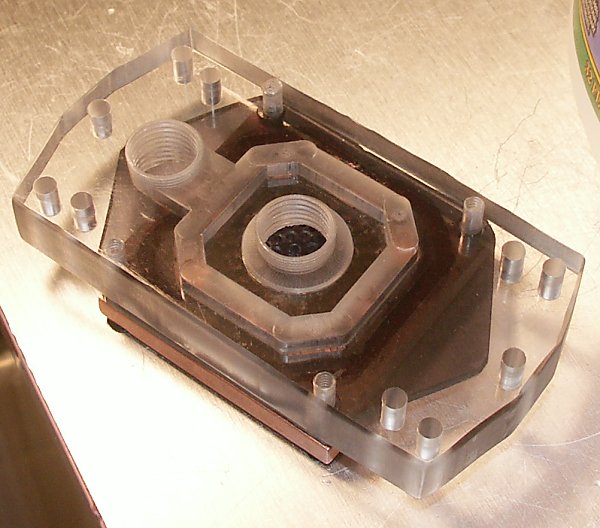 It's anything but perfect. Trying to do all the channels at 3 seperate times, setting up the mill each time, was a pain. But everything lines up and it goes together perfectly. Measurements Channel height = 1/8" Channel width = 1/16" Base thickness = 2mm Last edited by Captain Slug; 07-13-2006 at 12:42 AM. |
|
|
|
|
«
Previous Thread
|
Next Thread
»
| Currently Active Users Viewing This Thread: 1 (0 members and 1 guests) | |
| Thread Tools | |


|
|

All times are GMT -5. The time now is 08:52 PM.