 | ||
|
||
|
|||||||
| Hardware and Case Mod's You Paint it, Cut it, Solder it, bend it, light it up, make it glow or anything like that, here is your forum. |
 |
| Thread Tools |
|
|
#1 |
|
Cooling Neophyte
Join Date: Sep 2003
Location: South Africa
Posts: 82
|
I Have been experimenting with sending the mist from a Mist Maker through the radiator.
(At the bottem right of this page is a pic of the exact same one I got) The mist is extremely fine water droplets made by a Piezo-Electric ceramic disk which turns high frequency Alternating Current into a physical shape change or vibration. This mist evaporates and gives me a 7 deg C temp drop on my backup/test computer.   More on all this here After some measuring and CAD I decided to build an enclosure, which incorperates this, into the top of my Koolance case!: 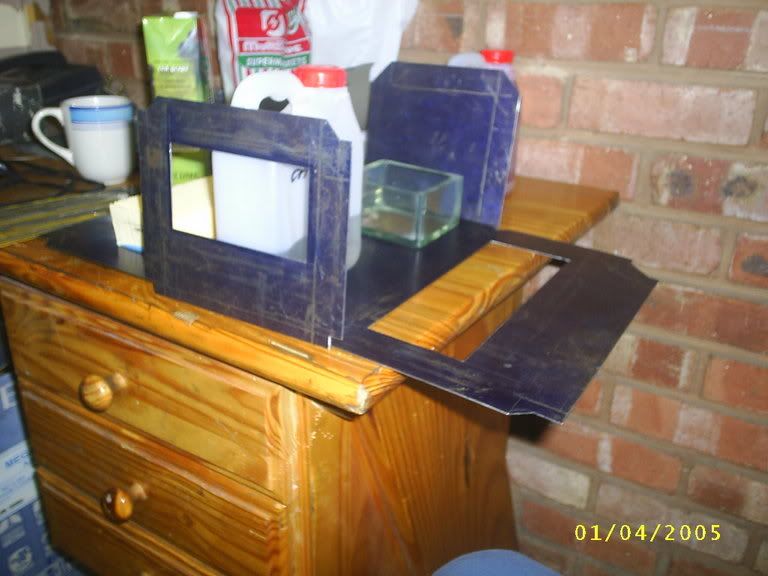 The pic shows the un-bent enclosure that will fit (hopefully) into the top of the koolance case. On the left is one of the air filters (Fiat Uno), and the hole on the right is for the other. These sides will be bent up and holes cut in the side covers of the case for airflow through the filters. The radiater will be in the top of the enclosure with all 3, std. Koolance fans sucking air out of the top. The rectangle cut out of the front plate is for a window so that you can see into the enclosure from the front of the case. The thing that looks like a glass ashtray will hold the Mist Maker and water. It actually goes on the bottem of the plate like so: 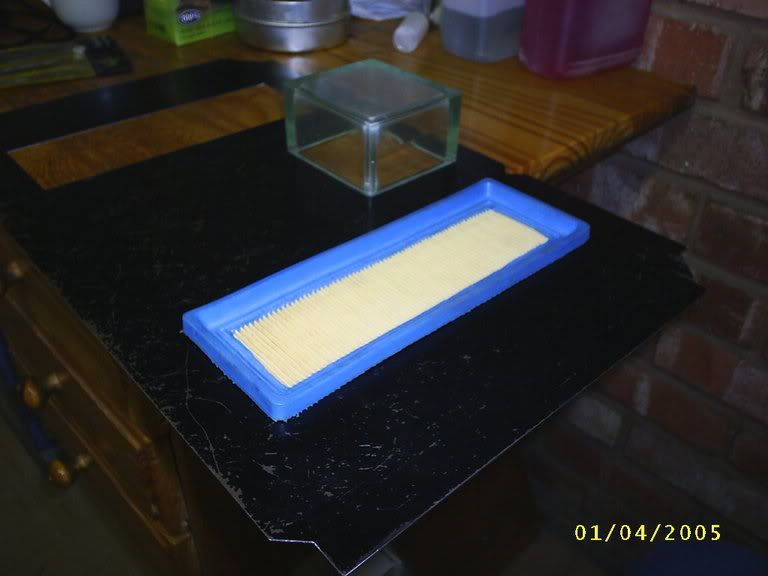 It will incorperate a cistern made from the float, needle and seat from a small motorbike's carburator. This will attach direct to the House plumbing with quick connects for getting it to LANS without the house!  : :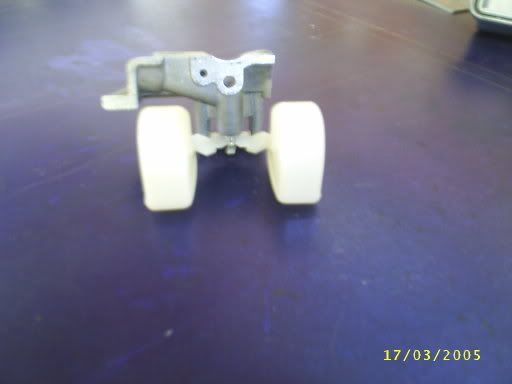 The 'Ashtry' is cast from clear casting resin using a Plaster of Paris mould with the cavity milled out: 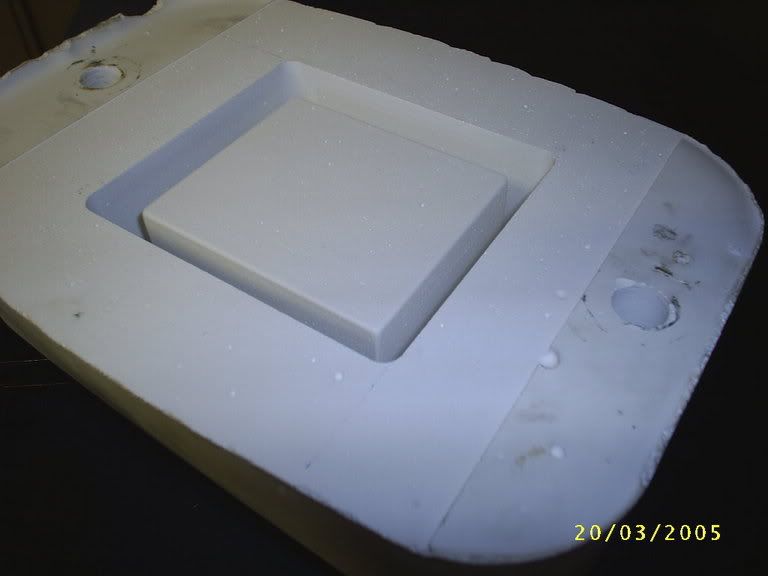 Mould Waxed: 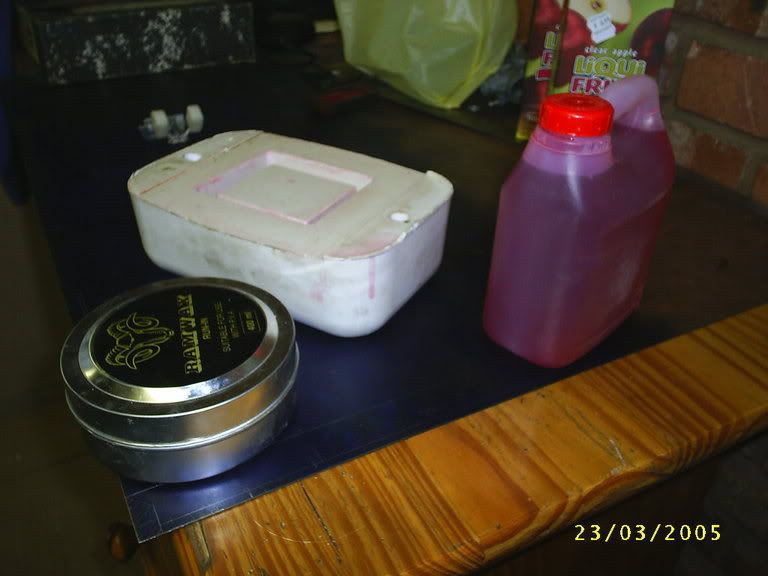 Resin poured: 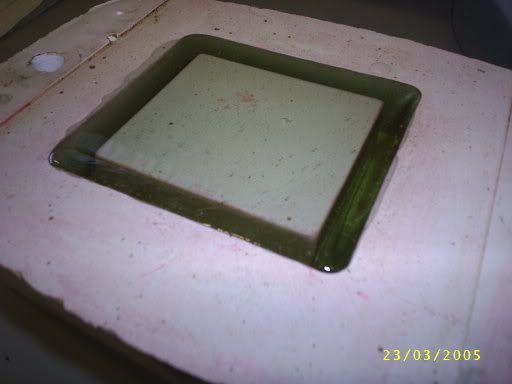 Ashtray!: (After a LOT of sanding and polishing  Looks better in real life with the bubbles in the casting adding an interesting visual effect. 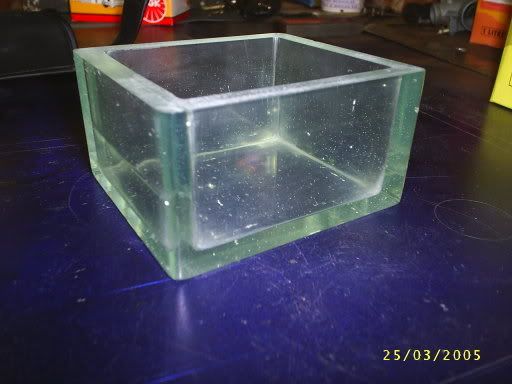 Well hopefully I'll get the plate bent tomorrow and put up pics of it with the 'ashtray' mounted. I'm thinking of drilling a hole for a LEd in the ashtray; so that the the whole thing glows blue? Some clear Silicone should transfere the light into the casting quite well? Also LED lighting for thr interior of the enclosure. |
|
|

|
|
|
#2 |
|
Cooling Neophyte
Join Date: Sep 2003
Location: South Africa
Posts: 82
|
This is taking ages!
 Got a car that I am busy fixing aswell. Heres an exploded view of the plumbing for getting water to the mist maker and draining it when its LAN time!  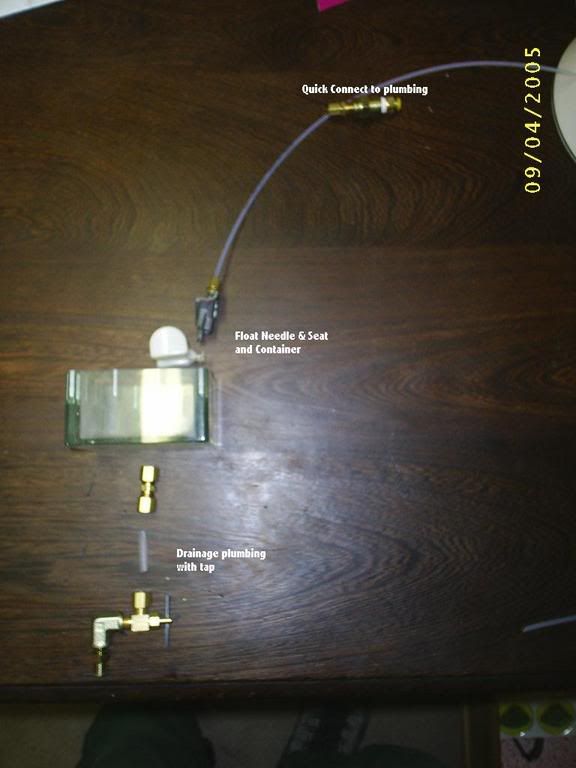 Input???? 
|
|
|

|
|
|
#3 |
|
Cooling Neophyte
Join Date: Sep 2003
Location: South Africa
Posts: 82
|
The Enclosure has been bent at last!
 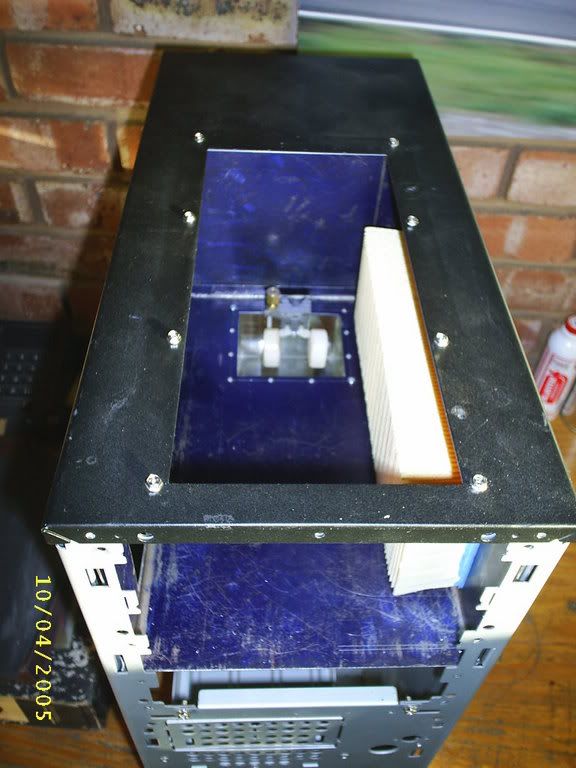 There we go! On the right you can see the lefthand side air filter. The 'Ashtray' container for the water, cistern, and mist maker is in place. 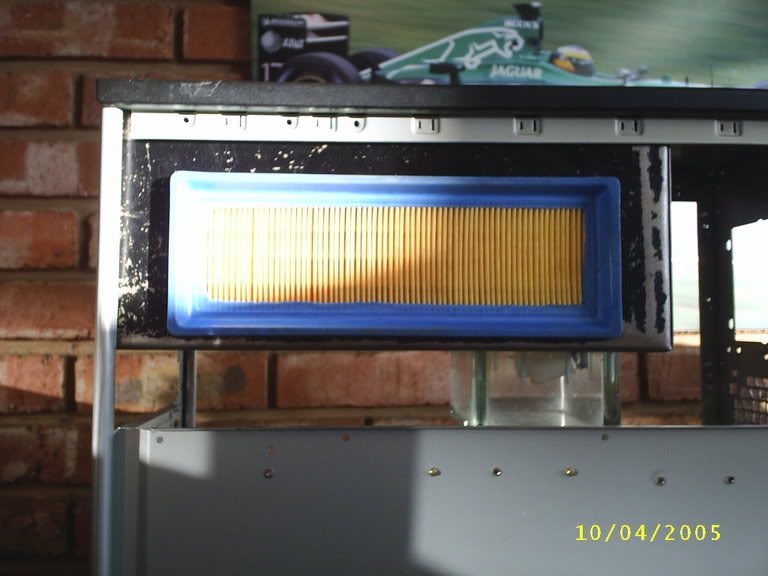 The Left Hand Side view gives some idea of what the hole in the side cover will look like. I cant decide what to for a grill for the side covers. Perhaps mill in vertical slots like those in power supplies, or some cromed wire grills to match the ones on the power supply? 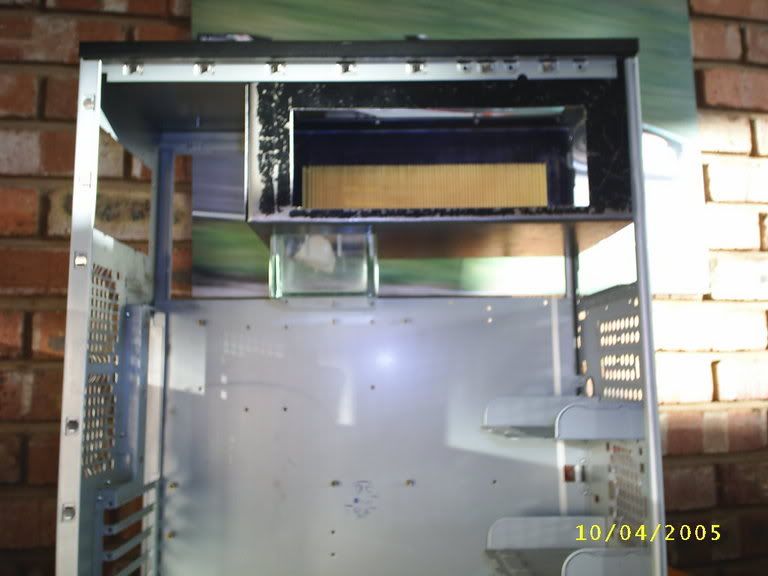 The right hand side view showing just enouggh space for my CD/DVD Combo drive, and not enough space for the power supply!  The power supply will stick out the pack of the case about a third of the way, with brackets to hold it.  So the big bits are done. Time for fitting, fiddling and testing. Then some galvanising and the Spray Job! 
|
|
|

|
|
|
#4 |
|
Cooling Savant
Join Date: Jun 2004
Location: Sweden
Posts: 152
|
Any update?
__________________
Very old specs below, but I keep it for sentimental values :-/ Gigabyte GA-7N400 Pro2, Barton 2500@3200  -11*201MHz, X800 XL -11*201MHz, X800 XL  , 1 GB Cosair 3200 (6-2-2-2) , 1 GB Cosair 3200 (6-2-2-2)  @400MHz in dual channel @400MHz in dual channelTurboBlock Rev. 1.0~0,15452756±0,004125251°C/W  , HL120.3 , HL120.3  with 3 Papst 4412@7volt with 3 Papst 4412@7volt  , Hydor L30II , Hydor L30II  |
|
|

|
|
|
#5 | |
|
Cooling Neophyte
Join Date: Sep 2003
Location: South Africa
Posts: 82
|
Quote:
The front and back will be bolted on with std. M3 computer case bolts. (the fine thread ones) It occured to me that I will need an overflow pipe for in-case the cistern does not block off the water when the 'ashtray' is full. working on that too. Not much to see really but will post pics if you say.  PS: My Volt modding and blue LEDs and stuff have arrived! |
|
|
|

|
|
|
#6 |
|
Cooling Neophyte
Join Date: Sep 2003
Location: South Africa
Posts: 82
|
***
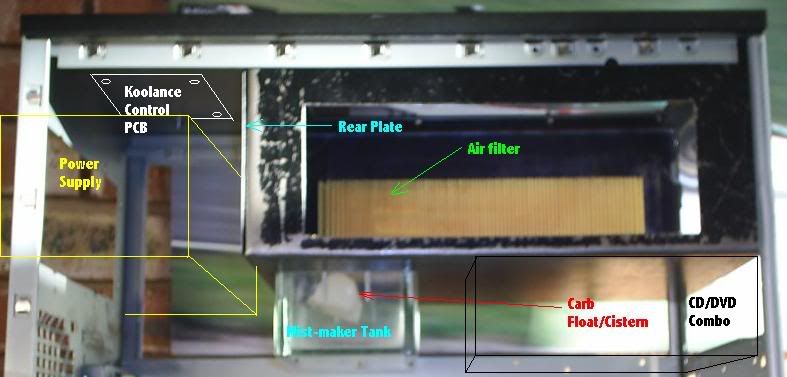 With any luck the enclosure will be completely water/air tight; Exept for the entrances, through the filters, and the exits, through the fans on top. The side covers will have cutouts for the filters. when they are in place the blue rubber part of the filter will be tightly squeezed between the enclosure and side covers. IE: With the side covers on I should be able to take the hose, pour water in the top, and have it running down the sides of the case. No water will get inside. ....Hopefully!  Problem is the 3 Koolance fans have to get power, as does the Koolance front PCB. (The one with the temp readout and mode buttons) Power for the 6 blue LEDs that will go into the top fans also need to get power. Also the mist maker. Gromets will work but I dont want to have to remove all the little plugs every time I want to work on that part of the computer. My solution: The wiring for the Front PCB and Fans go to the Koolance Control PCB, (top rear) through the Rear Plate. Plugs and all. *** 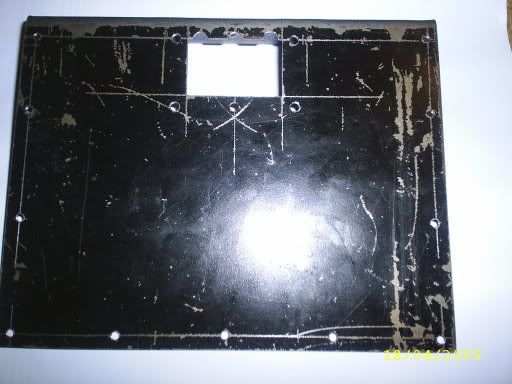 Here you see the Rear plate with a rectangle and 3 half holes cut out of it. *** 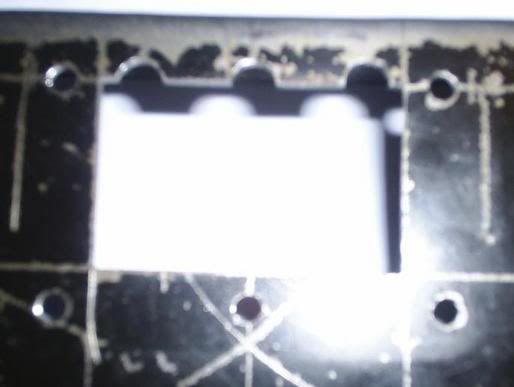 Close up. *** 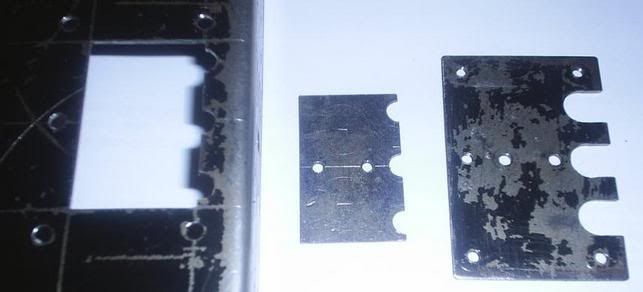 From left to right: The Back Plate The little plate that will fit in the Back Plate, completing the holes for the gromets. The plate that will fit over the Little plate and hold everything together. *** 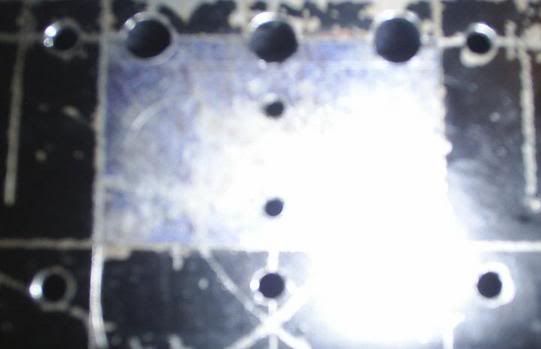 Little plate in the Back Plate. *** 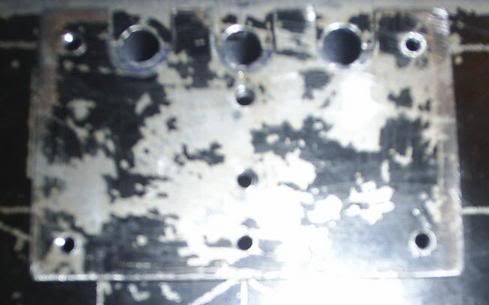 Plates in place on/in the back plate. *** 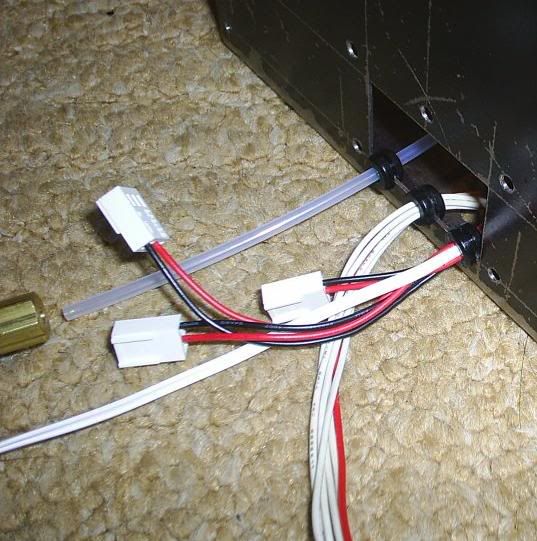 Wires, and Mist Maker Supply, through the back plate. *** 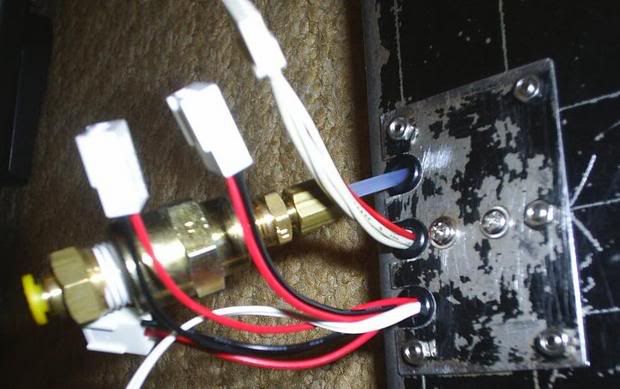 Everything fastened in place. I will have to put a layer or two of heat shrink around the water pipe to get it to fit the gromet. All the plumbing also needs to exit the enclosure without leaks. To ensure minimum pipe lengths I want to put everything together before deciding where to drill the holes for the plumbing gromets. O yea: The christmass lights:  *** 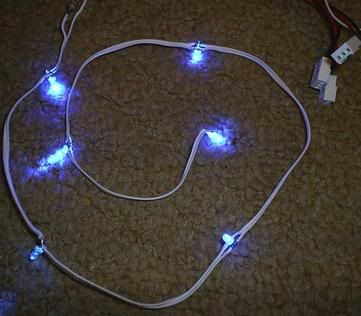 The 6 LEDs that will go into the top 3 fans after they have been sprayed silver. Sorry this is taking so long; I bought a Mazda 626 200i to fix up and sell. Its pretty beat up but is coming along nicely. Goes like hell! Spray painting tomorrow. 
|
|
|

|
|
|
#7 |
|
Cooling Neophyte
Join Date: Sep 2003
Location: South Africa
Posts: 82
|
Car;'s panel beated & Painted so I've had some time for the Mod.
 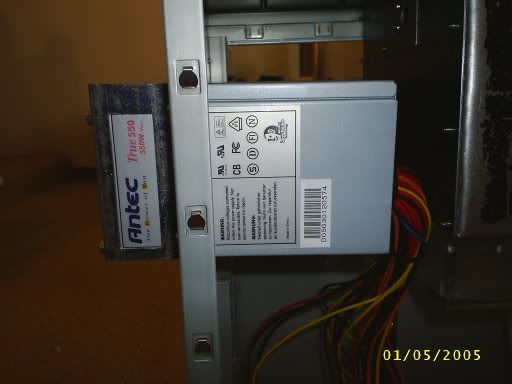 The Enclosure is too long for it and the PSU; so brackets. 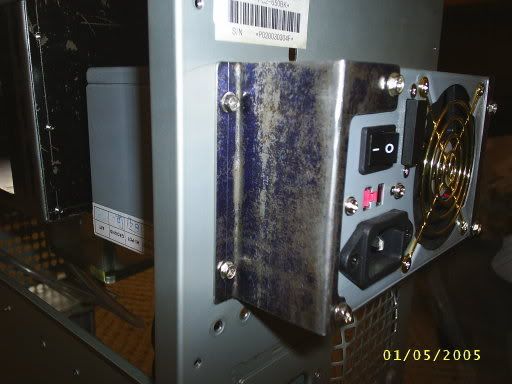 More brackets. 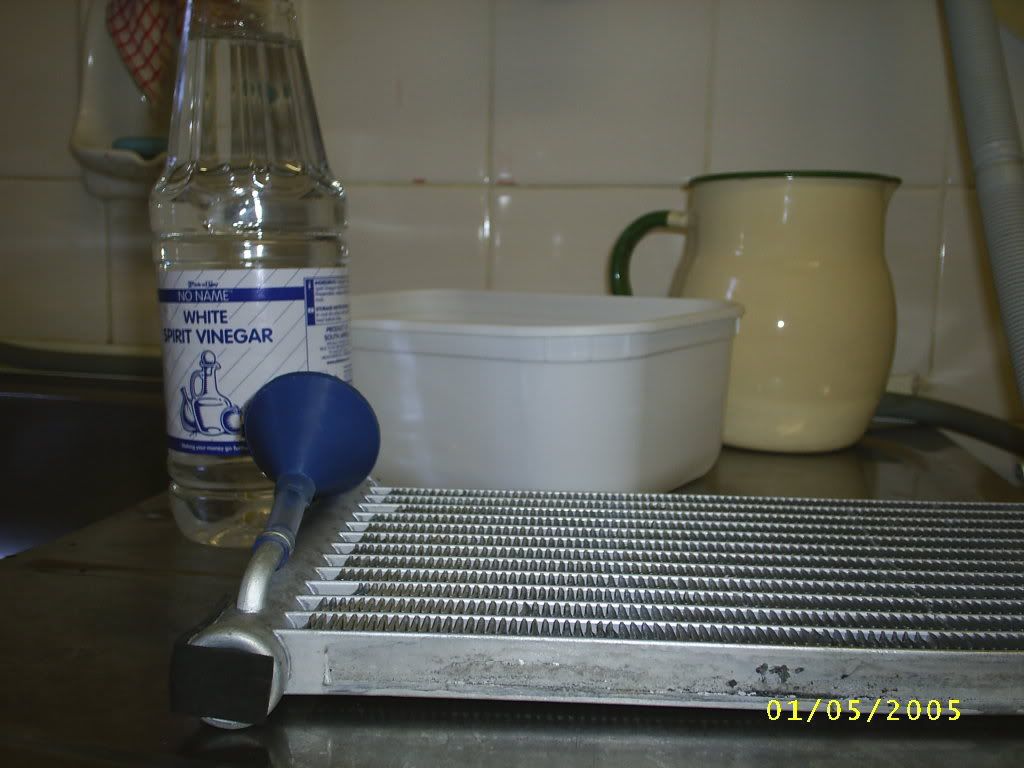 Rad Cleaning 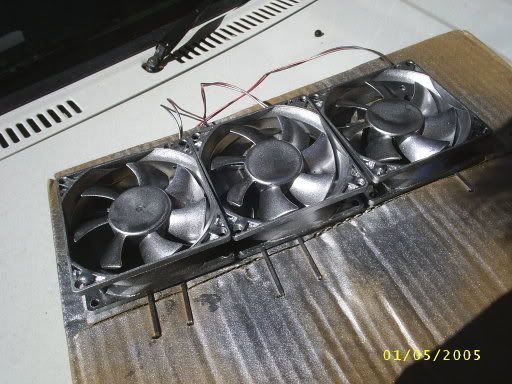 Bling for the fans: Drilled 2 holes/ fan for LEDs They dont shine up in the black So silver. The wires have to go through the enclosure seal, and I want to be able to see unevaporated mist. 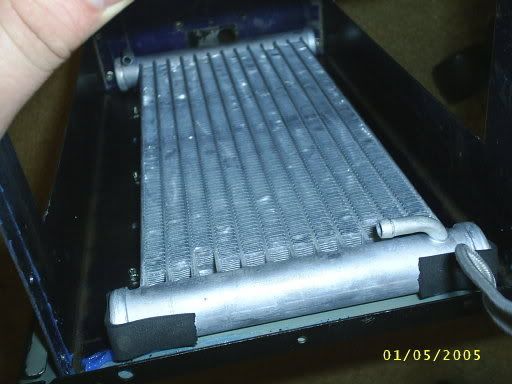 Rad Clean. 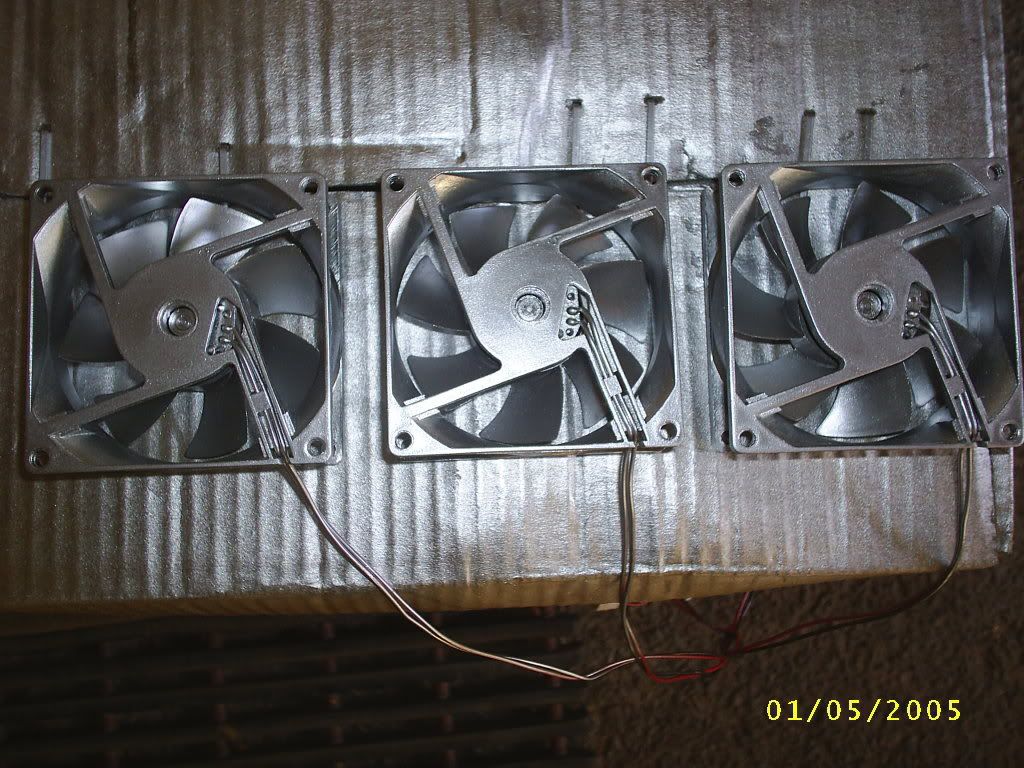 All 3 fans will be sucking air: Through 2 car air filters; Cooling due to evaporated mist; Through the rad. 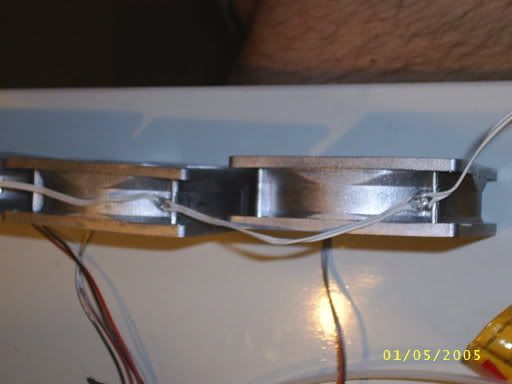 Blue LEDs 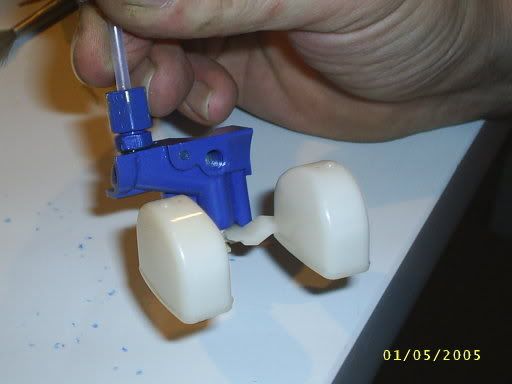 Cistern: Made from a Carb Float Needle & Seat. Painted with Etching Primer & 2K. I also blew some through the Water channel. Galvanic Corrosion, hopefully wont be a problem. Theres more, but I need to Sleeep. 
|
|
|

|
|
|
#8 |
|
Cooling Neophyte
Join Date: Apr 2005
Location: Torremolinos, Spain
Posts: 76
|
Be aware that you painted your fans power terminals with a metallic paint.
|
|
|

|
|
|
#9 | |
|
Cooling Neophyte
Join Date: Sep 2003
Location: South Africa
Posts: 82
|
Quote:
They have been running fo most of the weekend so far; no problem. The mist is not evaporating completely before going through the rad. I have been experimenting with fans. Damn camera's battery's are flat again!  
|
|
|
|

|
|
|
#10 |
|
Cooling Neophyte
Join Date: Sep 2003
Location: South Africa
Posts: 82
|
Some more photos:
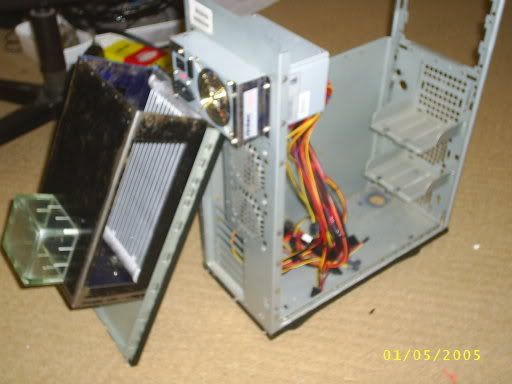 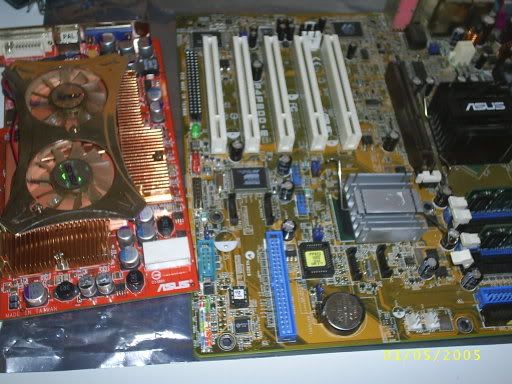 The MB & Vid Card: A P4P800E De Lux & Asus 9800 Pro. the 9800 Pr0 has a R360 core and has been flashed to a 9800 XT. I will do the Droop & V Dim mod on the MB and a V core & V mem mod on the card later. I'll also be adding some of the missing caps to the MB. 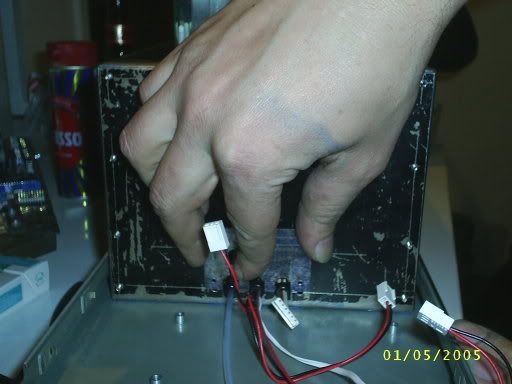 Its really fiddley to get all the bits into the enclosure; They are all in and the wiring cover is going on. 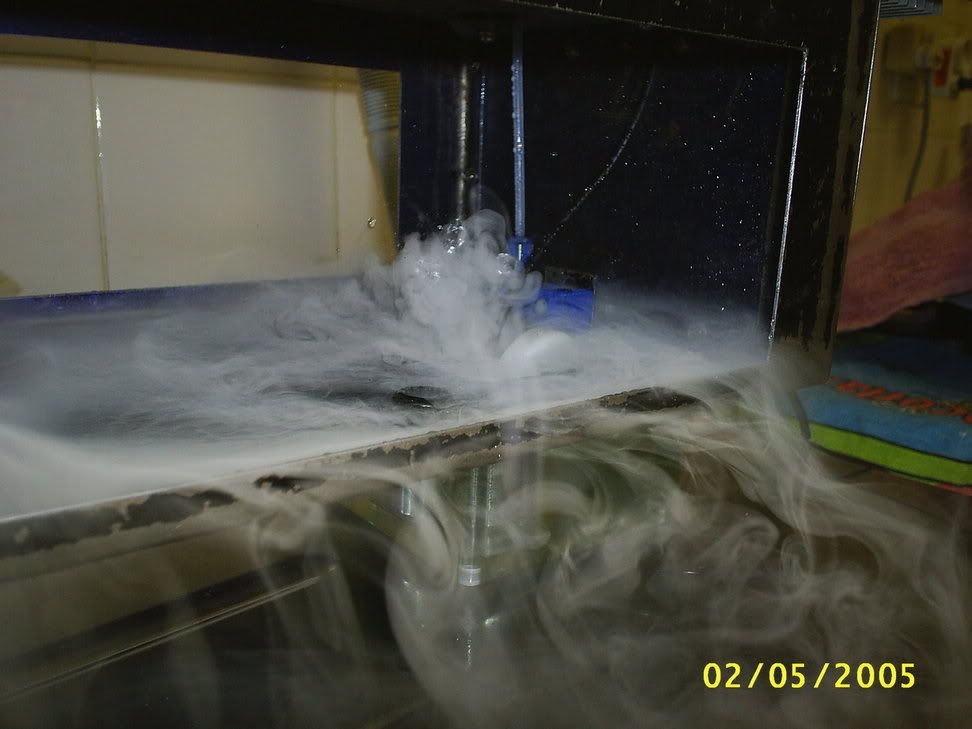 We have mist! The fans are off here and the cistern is doiung a good job of keeping the water level constant. 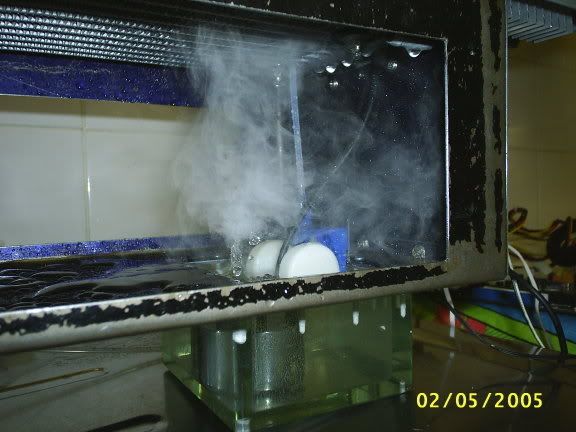 With thye fans on you can see that the mist is drawn through the radiator before it has evaporated. Some fans will have to be placed in the enclosure to get most of it to evaporate and cool the air before going through the rad. I experimented over the weekend and have come up with a good configuration for said fans and some mesh. 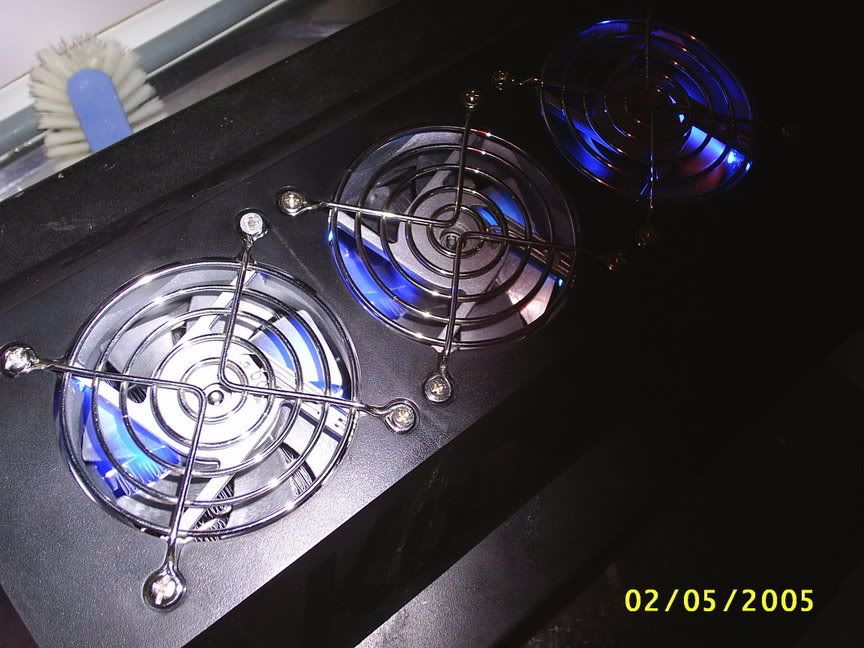 The lit fans. They contain 2 LEDs each. I'm thinking of going for 4 each?? 
|
|
|

|
|
|
#11 |
|
Cooling Savant
Join Date: Jun 2004
Location: Sweden
Posts: 152
|
Nice mist!
Be ware of to much light, It can be frustrating when watching movies and so... Any temp readings? (Should be about 4° lower than before) Are you using anything to dry the room? (you don’t want any moll in/on the walls) If you are, then you should connect that water to the mist chamber, its a lot of kalk (limestone), in tap water. By the way, is the containing walls made of alu or steel? If its steel you might consider to spray it with Zink, but let it dry for 2-3 days before touching it, otherwise it smears (well at least it did that for me)
__________________
Very old specs below, but I keep it for sentimental values :-/ Gigabyte GA-7N400 Pro2, Barton 2500@3200  -11*201MHz, X800 XL -11*201MHz, X800 XL  , 1 GB Cosair 3200 (6-2-2-2) , 1 GB Cosair 3200 (6-2-2-2)  @400MHz in dual channel @400MHz in dual channelTurboBlock Rev. 1.0~0,15452756±0,004125251°C/W  , HL120.3 , HL120.3  with 3 Papst 4412@7volt with 3 Papst 4412@7volt  , Hydor L30II , Hydor L30II  Last edited by mwolfman; 09-16-2005 at 04:35 AM. |
|
|

|
|
|
#12 | ||||
|
Cooling Neophyte
Join Date: Sep 2003
Location: South Africa
Posts: 82
|
Quote:
 Hmm... OK will leave it as is. Quote:
Holding the probe wire at a distance of about 12 cm I touched the probe to the underside of the rad below each fan. Ambiant was 26 C according to the probe. Front temp - 18C Middle - 18C Rear - 16C I dont know if 1deg C is close to 1 deg C for this probe??? A 10 C drop would be great, but I doubt it. Another thermometer gave very similar readings though.... The order of the temps swaps around at low fan speeds due to a fan cyclone thingy I made that that changes the distribution of the mist at the lower speed. The rad's water intake is in the front so I want the coldest air to go through the rear/ outlet side of the rad. Quote:
Will probably be quite healthy to have a little more moisture in the air around here.  The water mains will be connected to the cistern in the water 'bowl'. Not sure what you mean here? Quote:
This is taking a while as there is no other system like this to get info from. When everything is finalized I will Galvanize the Steel ennclosure, prime the surface with etching primer, and then spray the interior with metalic black 2K automotive paint. Probably car wax it after that aswell!  Interested in this Zink paint though. Is it specially fo corrosion resistance? The 2K is mixed with hardner and sets pretty quickly. |
||||
|
|

|
|
|
#13 |
|
Cooling Savant
Join Date: Jun 2004
Location: Sweden
Posts: 152
|
South Africa... sorry... (I’ve been to Kenya, that’s the closest)
I’m going towards the winter (cold as hell to day...) while you are going towards the summer… My mother will visit South Africa in January (2006) to look at the nature (flowers)… "Interested in this Zink paint though. Is it specially fo corrosion resistance?" Yeap, we (In northern Europe) use it on the car and so on... "The water mains will be connected to the cistern in the water 'bowl'. Not sure what you mean here?" Hmm, thinking... What I mean here is, if you use normal tap water toll refill the bowl, then the water will leave dirt (limestone, I’m not sure if that the correct translation from Swedish) on everything after a while the area between the radiators fins will be reduced.
__________________
Very old specs below, but I keep it for sentimental values :-/ Gigabyte GA-7N400 Pro2, Barton 2500@3200  -11*201MHz, X800 XL -11*201MHz, X800 XL  , 1 GB Cosair 3200 (6-2-2-2) , 1 GB Cosair 3200 (6-2-2-2)  @400MHz in dual channel @400MHz in dual channelTurboBlock Rev. 1.0~0,15452756±0,004125251°C/W  , HL120.3 , HL120.3  with 3 Papst 4412@7volt with 3 Papst 4412@7volt  , Hydor L30II , Hydor L30II  |
|
|

|
|
|
#14 | |||
|
Cooling Neophyte
Join Date: Sep 2003
Location: South Africa
Posts: 82
|
Quote:
From desert to paradise for a week or two. Flowers as far as the eye can see! One of nature's little miracles.  Quote:
 Dont know this stuff here. Dont know this stuff here.Quote:
Using a water purifier or distiller or softener will help a lot. I've decided to just clean off any scale, when necessary, with vinigar. 
|
|||
|
|

|
|
|
#15 |
|
Cooling Neophyte
Join Date: Sep 2003
Location: South Africa
Posts: 82
|
Testing caused the enclosure to rust quite a bit.
So I sanded down all the steel plate bits and had them galvanised: 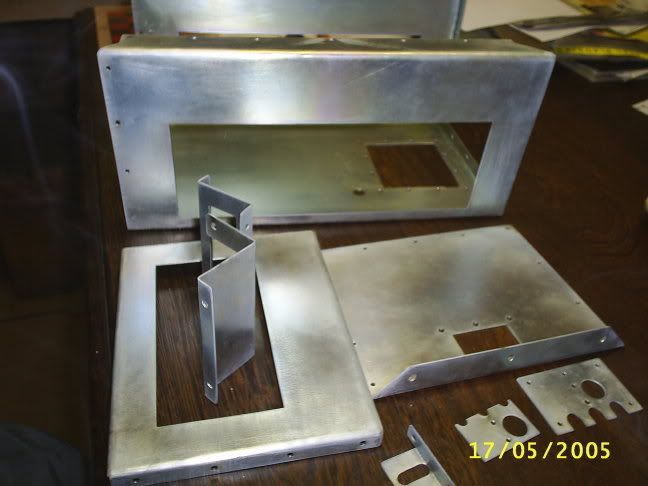 All nice and shiny! Seems a pity to paint them but I want to keep wet metal down to a minimum. This is my centrafuge/fan/evaporator thingy: 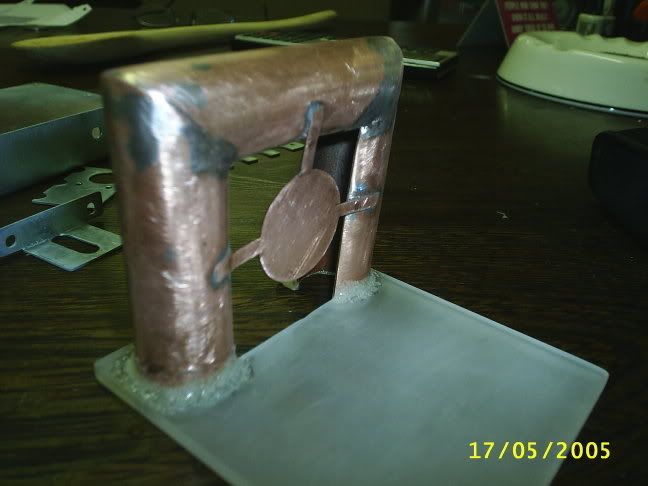 A fan, without the frame, attaches to the centre bit with the blade's tips inside the slotted tubing. The idea is that larger droplets will be thrown from the centre ******d, into the tubing, by centrafugal force. Her the circular shape of the tupe, along with the wing tip vortices, will cause the mist to keep being cycled through the fan until it has evaporated. Once the mist is evaporated it no longer weighs 'anything' and cool air is blown out closer to the centre. Seems to work quite well in testing. Remember you saw it here first!  I have spray painted all the galvanised bits with etching primer. They will be sprayed metalic black. Just some RAMSinks I'm making while waiting for paint to dry: 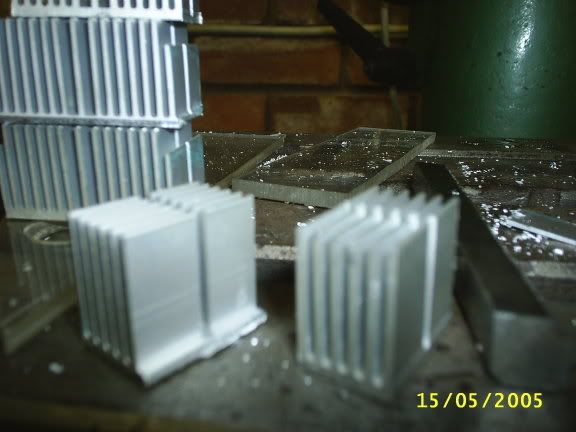 Made from 2 Celeron HSs. 
|
|
|

|
|
|
#16 |
|
Cooling Neophyte
Join Date: Sep 2003
Location: South Africa
Posts: 82
|
Finally had some time to work on this project again:
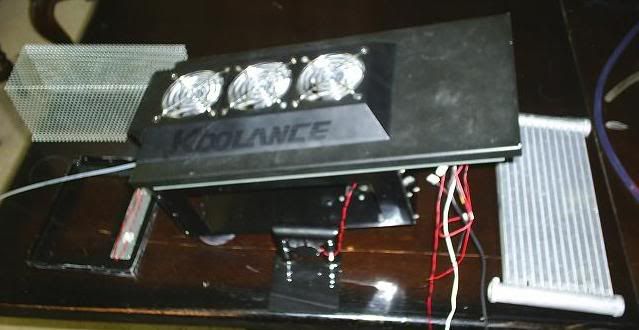 This is a bad photo of the enclosure and its components: Top left is the a rectangular mesh screen for catching most of the droplets that would normally end up on the radiator and air filters. Effectivly blocking airflow. Left is the front cover with LED lighting mounted. No window yet. Bottem centre is the fan/centrafuge thingy for evaporating the water mist before it is blown through the rad. This way you cool the air before the rad rather than the room!  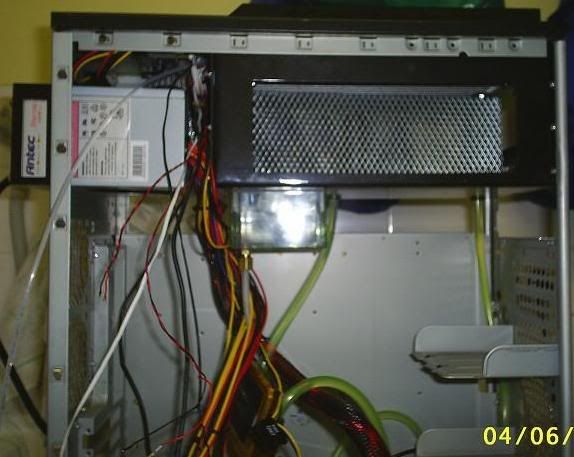 Everything assembled. The fan/centrafuge is just above the centre water pipe. It blows cool air and some mist towards the front fans. The air filter will go in the rectangular hole where you can see the mesh. The cistern is keeping the water level constant beautifully! 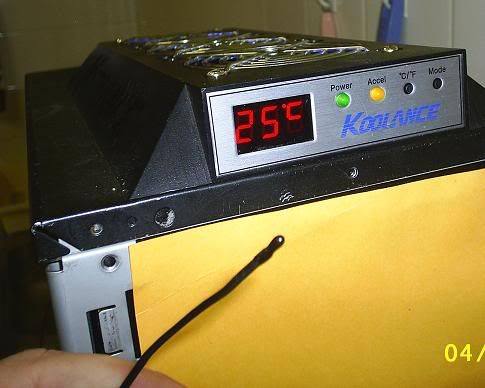 Ambiant temp. You can see the thermal probe that is normally attached to the CPU block, in my hand. 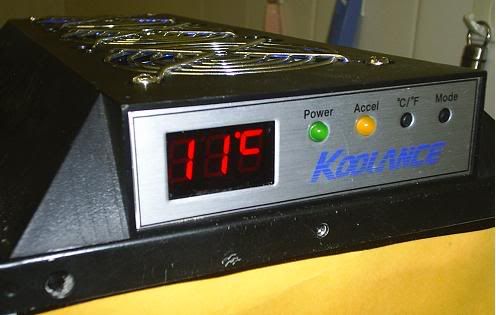 Here the probe is just below the radiator, so should be giving a good indication of the air temp of the air that is sucked through it. Thats a 14 C temp drop in air temps!!! When the probe is attached to the CPU waterblock, in its normal possition, it reads 17C after around an hour. Thats 8C below ambiant! This seemed to indicate that a lot of the cool air is going through the radiator without cooling it down much. A nice cool room would be nice, but I'd rather have the CPU block at 11C. I think that once there is a load on the cooling loop the efficiency of the system will increase.?  O Yeah: It makes very little difference weather the fans are on high or low. Perhaps slowing them down a little more, some how, will give the mist more time to evaporate? How?? |
|
|

|
|
|
#17 |
|
Cooling Neophyte
Join Date: Sep 2003
Location: South Africa
Posts: 82
|
Firstly;
Let me apologise for not using a picked Rad; Wb; Pump etc. Been there. Seen it... BMW HC, milled WB on AMD 900 TB @ 1035. (Years ago) More interesting things to wonder about. When was the last time youy did something new?? FU.  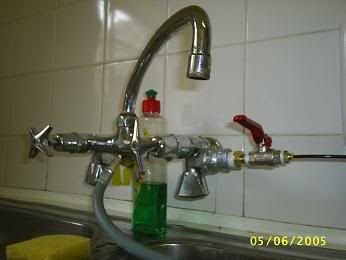 Eye catching plumbing... This is the water supply to the cistern. 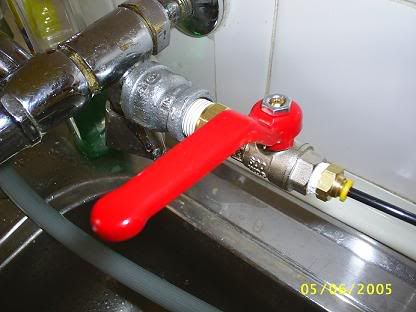 Quick Connect Fittings 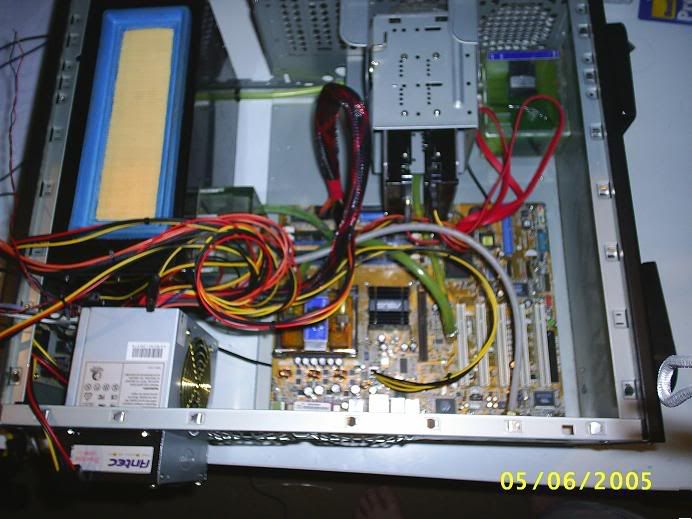 P4p800E dlx. In. 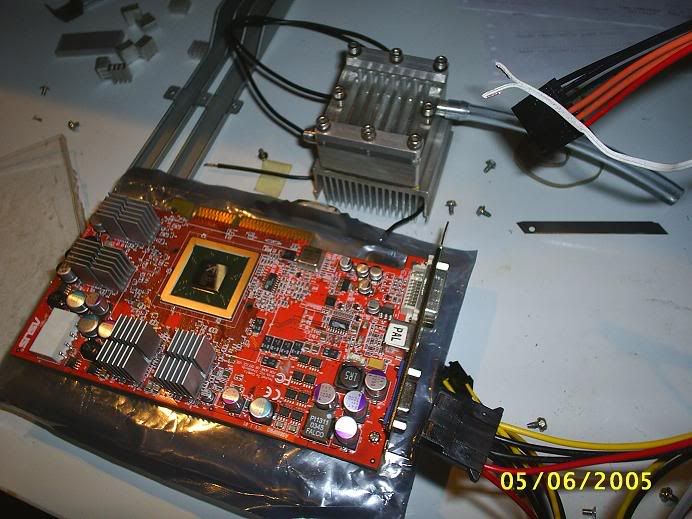 9800Pro (360 core) XT flash HSs made from 2 Celeron HSs. 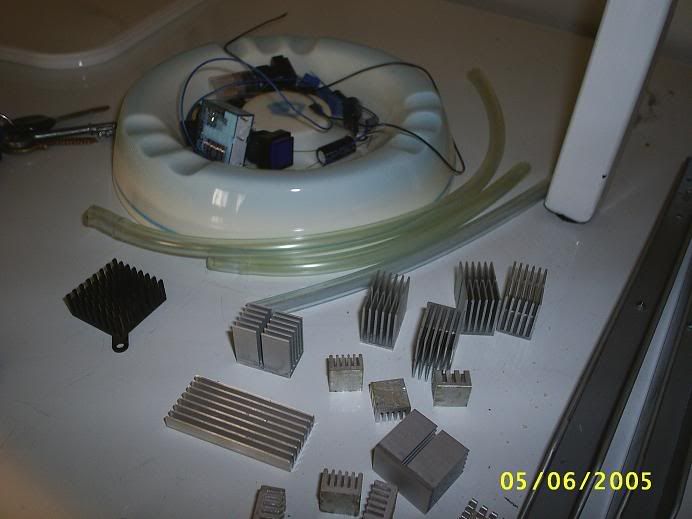 Caps, Pots, 28K, LEDs, Hss. For later.... 
|
|
|

|
|
|
#18 |
|
Cooling Neophyte
Join Date: Jul 2004
Location: BC, Canada
Posts: 15
|
Did you ever get this finished? Looks great up to the point you left off, I'm very curious as to the cooling ability of the setup, clearly it can do quite well with no load, but the question remains: can the gains stand up when there's a heat source?
|
|
|

|
|
|
#19 |
|
Cooling Neophyte
Join Date: Sep 2003
Location: South Africa
Posts: 82
|
Temps where around 8C lower under load WeaselBlade.
The project has been mothballed for the time being due to unforseen circumstances: Sold my business along with a lot of the tools and machinary, and have been very buzzy with a computer business. I will finish it at some point. However the cistern rusted up as I feared. This will have to be replaced with a: float, micro-switch, relay, pump setup. Will post some more pics and screenshots if anyone is still interested? 
|
|
|

|
|
|
#20 |
|
Pro/Staff
Join Date: Oct 2001
Location: Klamath Falls, OR
Posts: 1,439
|
Interested to see if it can be made long-term usable. If it requires too much fiddling and maintenance...
|
|
|

|
|
|
#21 | |
|
Cooling Neophyte
Join Date: Sep 2003
Location: South Africa
Posts: 82
|
Quote:
As a first, there are bound to be a lot of teathing probs. Have already taking it apart and put it back together more times than I can remember! 
|
|
|
|

|
|
|
#22 |
|
Cooling Neophyte
Join Date: Oct 2005
Location: Mission, KS
Posts: 12
|
The thing that interests me about this is the possibility of using it as an occasional "extra boost" mod. Rad would work normally without the misting, but for a heavier gaming or hotter night you could flip on the mist. Definately cool.
|
|
|

|
|
|
#23 | |
|
Cooling Neophyte
Join Date: Sep 2003
Location: South Africa
Posts: 82
|
 Quote:
No condensation worries though! Why occasional if you have it connected to the water mains??  1: Needs to be in a all plastic enclosure. 2: Mist needs to evap. completely before going through the rad. for max cooling. 3: Enclosure needs to be below the case or seperate from it. Access is a bid prob. with the prototype as many changes are reqd. initially. 
|
|
|
|

|
|
|
#24 |
|
Cooling Savant
Join Date: Oct 2003
Location: 15143
Posts: 358
|
Somehow I've missed this thread until now. Dunno, very nice work.
__________________
www.procooling.com: It's true we are often a bunch of assholes |
|
|

|
|
|
#25 | |
|
Pro/Staff
Join Date: Oct 2001
Location: Klamath Falls, OR
Posts: 1,439
|
Quote:
|
|
|
|

|
 |
«
Previous Thread
|
Next Thread
»
| Currently Active Users Viewing This Thread: 1 (0 members and 1 guests) | |
|
|
All times are GMT -5. The time now is 11:37 PM.


