 | ||
|
||
|
|||||||
| Water Block Design / Construction Building your own block? Need info on designing one? Heres where to do it |
 |
| Thread Tools |
|
|
#76 |
|
Cooling Savant
Join Date: Jan 2006
Location: VA
Posts: 129
|
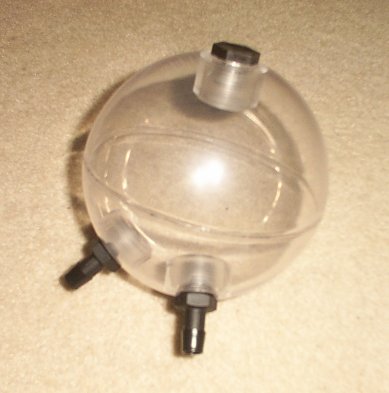
I just finished this acrylic reservoir for a custom case I'm machining for a very patient client. The outer diameter is 6 inches.
 The 1/2" NPT threaded plugs were made using a manual lathe and the hemispheres were ordered from an R/C hobby site. |
|
|

|
|
|
#77 |
|
Cooling Neophyte
Join Date: Nov 2004
Location: BULGARIA
Posts: 9
|
combo pompe-restank. the pomp needs some moding resollting to endless working one.
Last edited by kolombo; 02-25-2006 at 04:22 AM. |
|
|

|
|
|
#78 |
|
Cooling Savant
Join Date: Mar 2003
Location: Hamburg
Posts: 141
|
what pump is that?
|
|
|

|
|
|
#79 |
|
Cooling Neophyte
Join Date: Nov 2004
Location: BULGARIA
Posts: 9
|
italiano spagetii magna drive (loundry machine). without moding it's garbage. 2m. head and cheapy.
Last edited by kolombo; 02-28-2006 at 10:49 PM. |
|
|

|
|
|
#80 |
|
Cooling Neophyte
Join Date: Apr 2005
Location: Ludlow, MA
Posts: 15
|
What would be great is some instructions on creating your own resevoir. Currently getting together/building the parts for my own watercooling system and could use some info on the resevoir. Especially things like measurements for the 5-3/4" bay res =\ I've got some acrylic glass here in 1/4" thickness and I'm looking to build one but do not know where to start~
|
|
|

|
|
|
#81 | |
|
Cooling Savant
Join Date: Oct 2004
Location: Sunny Florida
Posts: 246
|
Quote:
if you don't or can't laser cut, use the largest saw blade possible - as this will give you the straightest cut. weld-on won't work well unless the edges are very true and straight finally, don't use fittings that use pipe thread as they have a tendency to crack acrylic you want a fitting with a rubber washer and a flange - get thread specs elsewhere on the forum jman ps don't use silicon to seal anything as silicon is NOT designed for full immersion and WILL leak after prolonged exposure |
|
|
|

|
|
|
#82 |
|
Cooling Savant
Join Date: Oct 2004
Location: Sunny Florida
Posts: 246
|
Built a new res for my new system
Made form 1.5" copper pipe a rubber plug with the center bored out allows for the pump to be connected directly due to difficulties drain previous systems, i added a petcock in the elbow some pics... jman |
|
|

|
|
|
#83 |
|
Cooling Neophyte
Join Date: Apr 2005
Location: Ludlow, MA
Posts: 15
|
Hmm I noticed that the barbs of choice use 1/2" npt... The tap for that would cost me 90$+ and I don't have access through a friend :X
Is there a method I could use to fit some 1/2"npt barbs into acrylic without that tap? What diameter could/should I drill to possibly let the fittings tap themselves slightly with some epoxy to seal? |
|
|

|
|
|
#84 | |
|
Cooling Savant
Join Date: Oct 2004
Location: Sunny Florida
Posts: 246
|
Quote:
i bought a 1/2" - 14 NPT pipe tap for under $30 - i think it was $15 # 1905 UPC 42526 01905 shucks I'll sell you mine for $30+ shipping if you want otherwise use a drill bit least 45/64" in diameter later jman |
|
|
|

|
|
|
#85 |
|
Cooling Neophyte
Join Date: Jun 2006
Location: Salt Lake City, Utah
Posts: 1
|
Cheap, super custom, and works great!!
  Just finished my rad shroud  
__________________
My system: CPU: Opteron 165 Dual Core 1.8GHz@3.0GHz Memory: OCZ 2x1Gb PC3200 Platinum EL@ 480MHz Motherboard: Asus A8N32-SLI Deluxe Video Card(s): 2x eVga 6600GT Sli Sound Card: Creative Audigy ZS PSU: OCZ Powerstream 520 Hard Drive(s): 2x 36Gb Raptor Raid 0 My Custom Water Cooling |
|
|

|
|
|
#86 | |
|
Cooling Neophyte
Join Date: Jun 2007
Location: NL EU
Posts: 2
|
Quote:
|
|
|
|

|
|
|
#87 |
|
Cooling Neophyte
Join Date: Aug 2004
Location: france
Posts: 17
|
Hello!
 
__________________
Sorry for my english ........ i am frenchy 
|
|
|

|
|
|
#88 |
|
Pro/Staff
Join Date: Oct 2001
Location: Klamath Falls, OR
Posts: 1,439
|
French is good! Nice looking reservoir, sir. However, at first glance, it did look like a particularly glossy pair of green pants.

|
|
|

|
|
|
#89 |
|
Cooling Neophyte
Join Date: May 2007
Location: IN
Posts: 3
|
pierreg60, where did you get that reservior? Me wants one

|
|
|

|
|
|
#90 |
|
Cooling Neophyte
Join Date: Aug 2007
Location: l.a.
Posts: 4
|
still needs a LOT of work. My first watercooling system and resevoir. Also, im only 15
 http://forums.extremeoverclocking.co...d.php?t=265993 more pics here while i wait for pic to upload... Will be buffing this. I was just checkign for leaks here. Go easy on me guys! (need to take off tape) ill post pics once finished 100%  Shot with COOLPIX P4 at 2007-08-04 |
|
|

|
|
|
#91 | |
|
Cooling Savant
Join Date: Apr 2002
Location: North of France
Posts: 198
|
Quote:
|
|
|
|

|
|
|
#92 |
|
Cooling Savant
Join Date: Jan 2006
Location: VA
Posts: 129
|
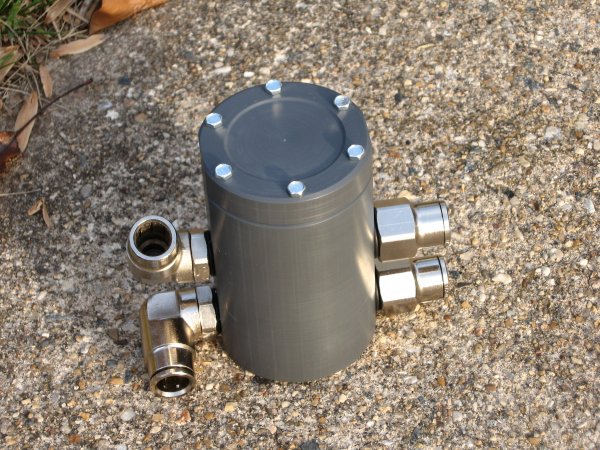
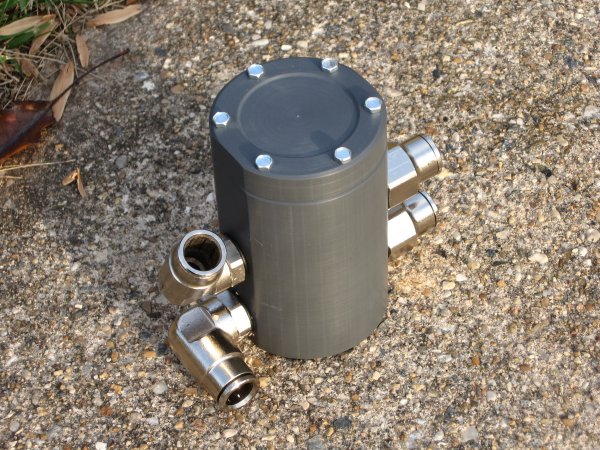
Reservoir made out of 2-1/2" PVC Rod using a machine lathe and a manual knee mill.
  The bottom ports connect to each other and not to the inside of the reservoir. |
|
|

|
 |
«
Previous Thread
|
Next Thread
»
| Currently Active Users Viewing This Thread: 1 (0 members and 1 guests) | |
|
|
All times are GMT -5. The time now is 08:38 PM.


